How to Add Data Analysis in Excel on Windows
Need to perform advanced statistical analyses but can’t find the Data Analysis ToolPak in Excel on your Windows PC? Don’t worry; here’s a straightforward guide on how to add Data Analysis in Excel on Windows 10 and 11 quickly and easily.
Table of Contents
Step 1: Open Excel and Check for the ToolPak
- Open Excel and create a new blank workbook.
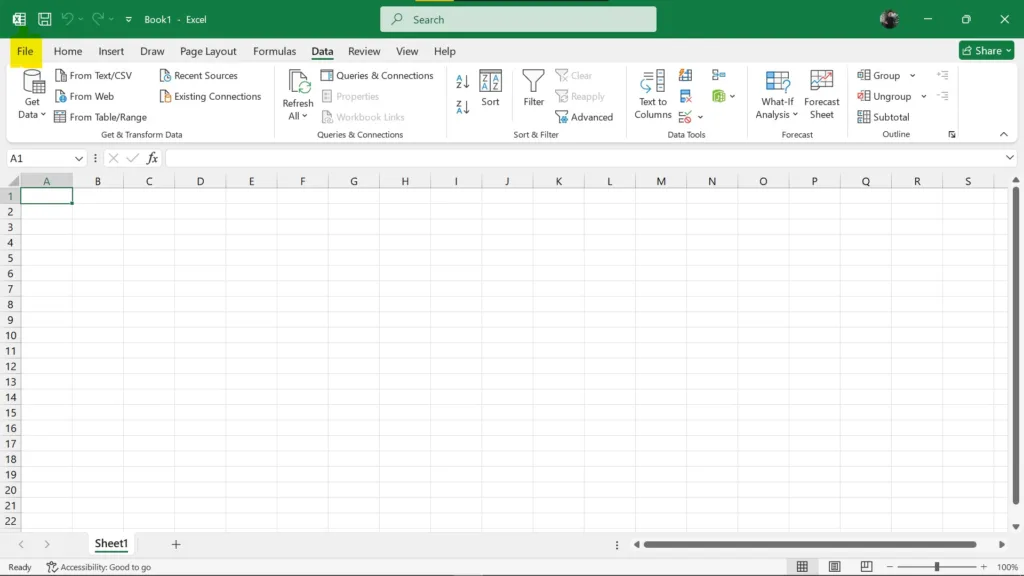
- Click on the Data tab in the top ribbon.
Look for the “Data Analysis” button on the far right.
- If it’s there, the ToolPak is already added.
- If not, proceed to learn how to add Data Analysis in Excel on Windows.
For additional details, you can refer to Microsoft Support, which provides step-by-step instructions.
Step 2: Access the Excel Add-Ins
- Click on the File tab in the top-left corner.
- Select Options at the bottom of the left-hand menu.
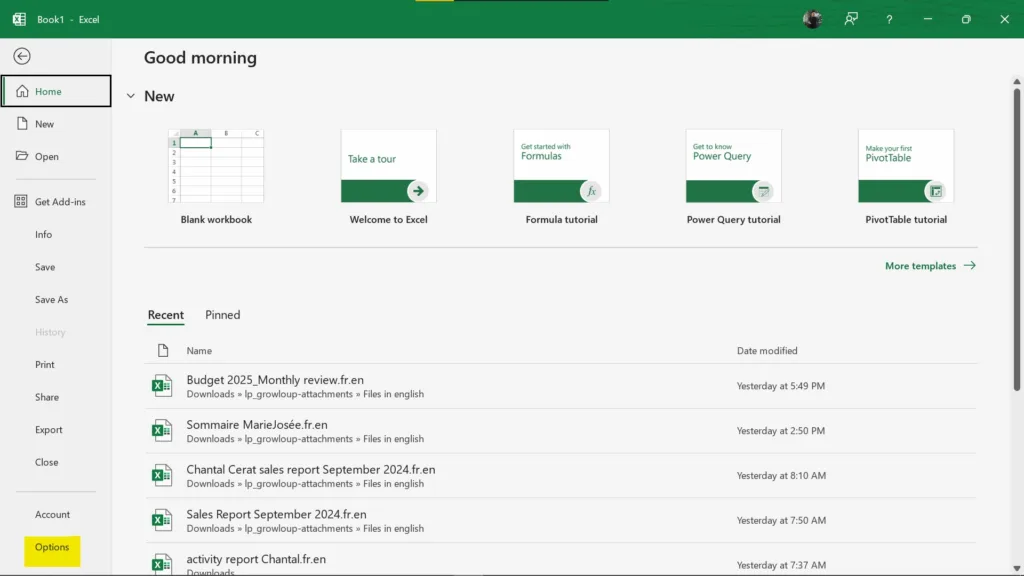
- In the Excel Options dialog box, click on Add-Ins.
- This is where you begin adding the Data Analysis ToolPak in Excel.
Step 3: Enable the Analysis ToolPak
- At the bottom of the dialog box, find the Manage drop-down menu.
- Select Excel Add-ins and click Go….
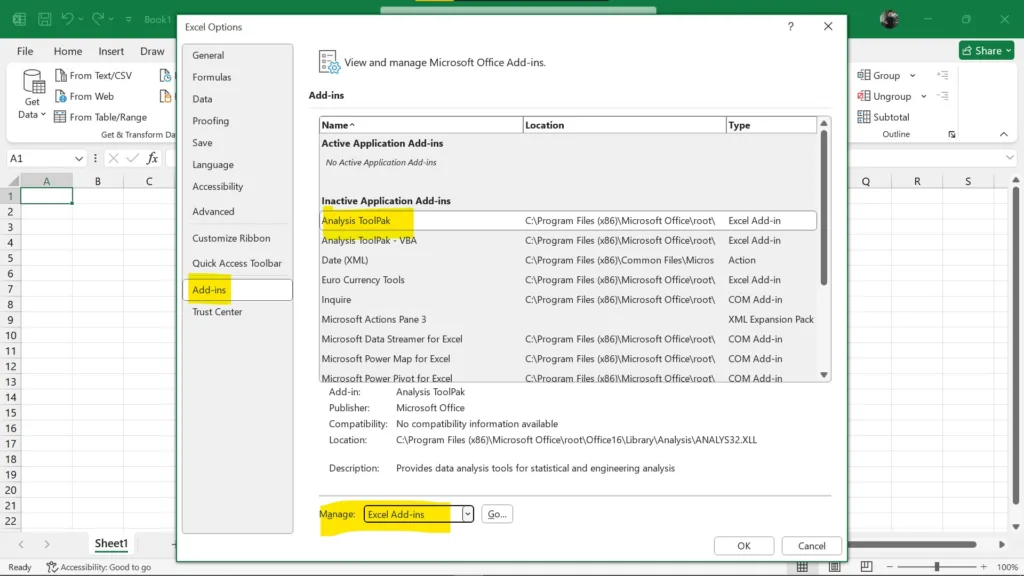
- In the Add-Ins available list, check the box next to Analysis ToolPak.
- If you don’t see it, click Browse… to locate it.
- Click OK to confirm.
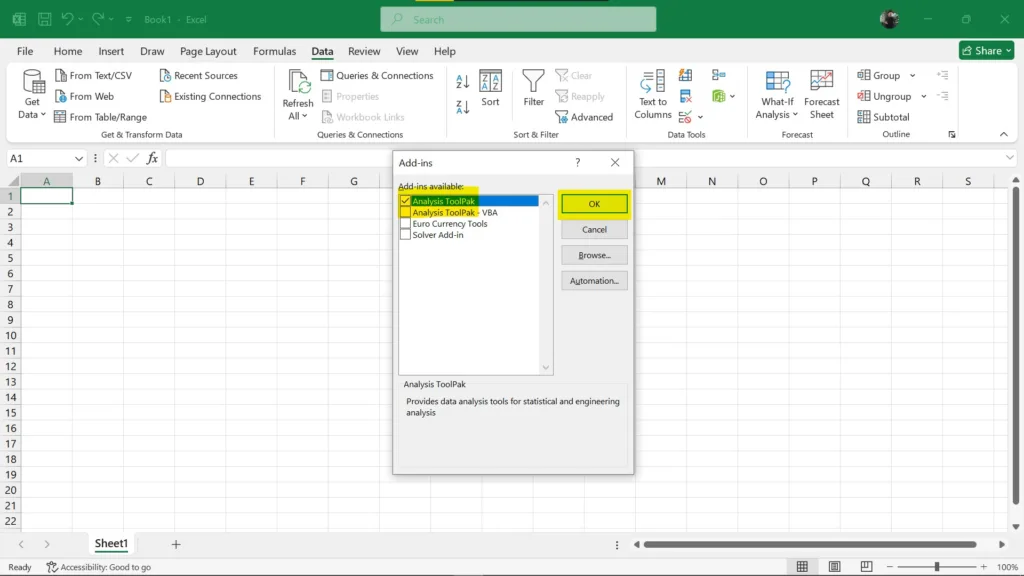
You’ve now completed a key step in how to add Data Analysis in Excel on Windows 11 and 10.
If the ToolPak isn’t listed, you may need to install it from the Microsoft Office setup. Alternatively, the Microsoft Community provides solutions for missing add-ins.
Step 4: Restart Excel (If Prompted)
- If prompted to install the ToolPak, click Yes.
- Close and reopen Excel to finalize the installation.
Step 5: Verify the ToolPak Is Added
- Reopen Excel and go to the Data tab.
- The “Data Analysis” button should now be visible on the ribbon.
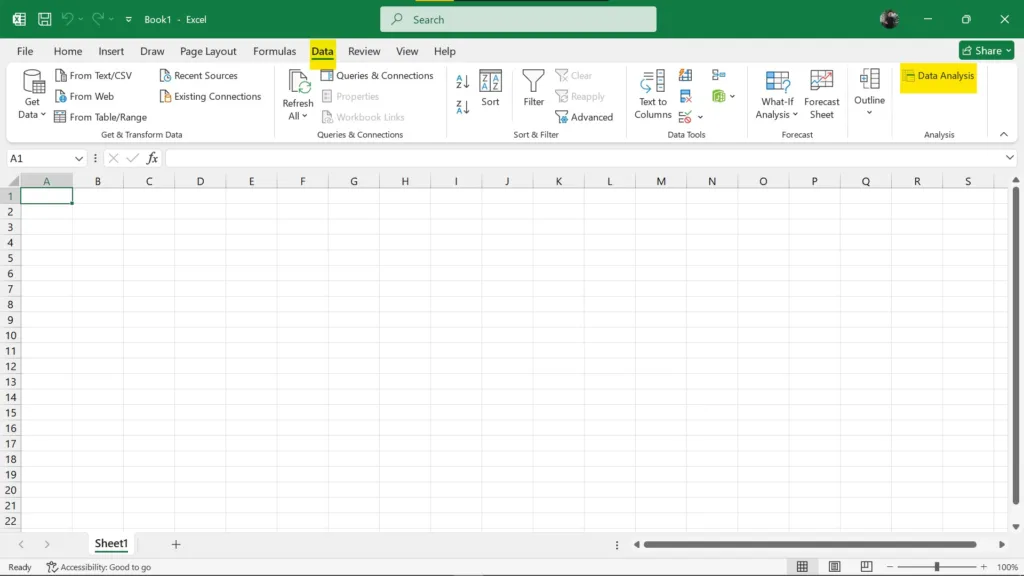
Congratulations! You’ve learned how to add Data Analysis in Excel on Windows.
For additional help, check out Quora’s guide on activating the Analysis ToolPak.
How to Use the Data Analysis ToolPak
- Click on “Data Analysis” in the Data tab.
- Select the analysis tool you need (e.g., Regression, ANOVA).
- Input your data ranges and parameters.
- Click OK to run the analysis.
Now that you know how to use the Analysis ToolPak in Excel, you can perform advanced analyses.
Troubleshooting Tips
Data Analysis Excel not showing:
- Ensure the ToolPak is enabled in the Add-Ins.
- Update Excel to the latest version.
Data Analysis not showing in Excel 365:
- The steps are similar; make sure the add-in is activated.
Where to find Data Analysis in Excel:
- It’s located in the Data tab on the ribbon after enabling the ToolPak.
Additional Resources
- Data Management: Learn about the 8 Top Master Data Management Tools in 2024 to organize your data efficiently.
- AI Tools: Discover the 8 Best AI Tools for Small Businesses to automate your analytics.
- SQL Usage: Improve your skills with SQL for Data Analysis | How to Best Use SQL in Data Analysis.
FAQs
Q: How to add Data Analysis in Excel Windows 10?
A: Follow the steps outlined above to enable the Analysis ToolPak via Excel Add-Ins.
Q: Data Analysis Excel not showing—what should I do?
A: Ensure the ToolPak is checked in the Add-Ins list and restart Excel.
Q: How to add Data Analysis in Excel Windows 11?
A: The process is the same as in Windows 10; access Excel Options and enable the ToolPak.
Q: Where is Data Analysis in Excel 2016?
A: After enabling the ToolPak, you’ll find it under the Data tab on the ribbon.
Q: Do I need administrative rights to add the Data Analysis ToolPak in Excel on Windows?
A: No, you can enable it yourself without admin privileges via the Excel Add-Ins menu.
By following this concise guide on how to add Data Analysis in Excel on Windows, you can unlock powerful data analysis features in Excel on your PC.
